9/24/2011

Vegetarian Paella -style rice

Now that I´m no longer pregnant and need to eat as much protein as possible, I´ve started cooking some vegetarian dishes again as I was eating far too much meat!! This dish is tasty, quick to cook and low in fat and is quite similar to a paella!The recipe has been slightly adapted from Cocina Vegetariana rápida by Anne Wilson.

Ingredients (for 2)
1 cup long grain rice (I used Basmati)
pinch of saffron
1 tbsp olive oil
1 small onion or 1/2 large onion, chopped
3 mushrooms, sliced
handful of frozen green beans
2 garlic cloves, crushed
1 tsp tumeric
1/2 tbsp sweet paprika
1/8 tsp ground cinnamon
1/2 litre vegetable stock (you might need to add a little more)-I used veggie Oxo cube
1/2 red pepper, chopped
1/2 tsp salt

Method
1.Place vegetable stock in a pan and add saffron strands.When it reaches boiling point, remove from heat.
2. Heat oil in a large frying pan and fry the onion, garlic, tumeric, paprika, cinnamon and rice until rice is infused with spices.
3. Add vegetable stock, red pepper,mushrooms, green beans and salt.
4. Once boiling point has been reached, lower the heat and cook slowly for 20 minutes until rice is tender.


9/18/2011

More Christening biscuits & Chloe´s Christening Cake

It´s quite difficult having a baby to find time to bake and furthermore blog about it, especially with Chloe´s Christening just around the corner I´d been busy organising it! As tradition states I had saved the top tier of my wedding cake-it´s a fruit cake so keeps very well particularly in the freezer-for the Christening cake. I took it out of the freezer to defrost 4 days before the Christening. I had planned to decorate it completely myself and had bought white and pink fondant, a smoother, edible glue, heart shape cutters and baby feet cutters. Unfortunately, it all went to pot...I did practice making the baby feet a couple of times and they turned out well, however my fondant had gone past it´s expiry date and was rock hard. Although I tried adding butter to it (I can´t buy shortening here!) and Glycerine, which helped it to become more supple and easier to work with, it was still very difficult to work with and cracked a lot. I also had a go at making some baby bootees which I think would´ve turned out if I hadn´t had the problems with the fondant/gumpaste mixture...they just collapsed and broke before I could stick them together. Luckily my mum had asked Amelia, who had made my wedding cake to make me a topper as a backup plan! She made me a beautiful ballerina teddy, a name plaque and some teddies for the side!

So in the end all I did was re-ice the cake with Royal Icing using the peak method (it´s easier than trying to get it completely smooth and time was of the essence!)with the help of my mum, then we stuck the teddies round the side of the cake and placed the teddy on top of the cake and the bootees and name plaque on the cake board and voíla!What do you think? Very cute,methinks! Will have to have some more attempts at the bootees and baby feet for the next one!!


I also wanted to make some decorated biscuits as favours for the guests even though I set myself up for a lot of work!! I made the biscuits on Thursday night, then using the leftover Royal Icing from the cake, I dyed a small quantity of it pink with red liquid food colouring. Using disposable icing bags and two Wilton no.2. nozzles I outlined the biscuits in white and filled in the bottles and the wheels of the prams. I then filled the prams in and the bottle teats with the pink icing, then on the bottles I piped Chloe´s name and simple designs such as lines for the measures and spots in pink and then on the pram spots and Chloe´s name in white. Practice definitely makes perfect as I think these are my best Christening biscuits to date and writing turned out much better than ever before.


To give my biscuits a more professional touch, my parents and I wrapped them in cellophane and tied them with pink ribbon curled at the end (I´m not really very good at doing these creative things so my parents helped me!!) and they turned out really well in the end! I was pretty impressed with myself! I definitely have to speed up though if I want to do this professionally some time!!


9/02/2011

Piña Colada Cheesecake & Bricoreposteria

For all you Spanish, cake-decorating, baking addicts whether you are a novice or amateur cake decorator or baker, I thouroughly reccommend a new(ish) specialist magazine, Bricoreposteria, packed full of cake decorating ideas and detailed step-by-step instructions and photos telling you how to recreate the featured cakes, advice and explainations about different caking tools, icing nozzles etc and recipes of how to make your own edible glue, fondant etc. It comes out bimonthly and costs 4.95Euros...my only complaint is that it is quite hard to find at my local newsagents, which means that I´ve missed out on a couple of issues.

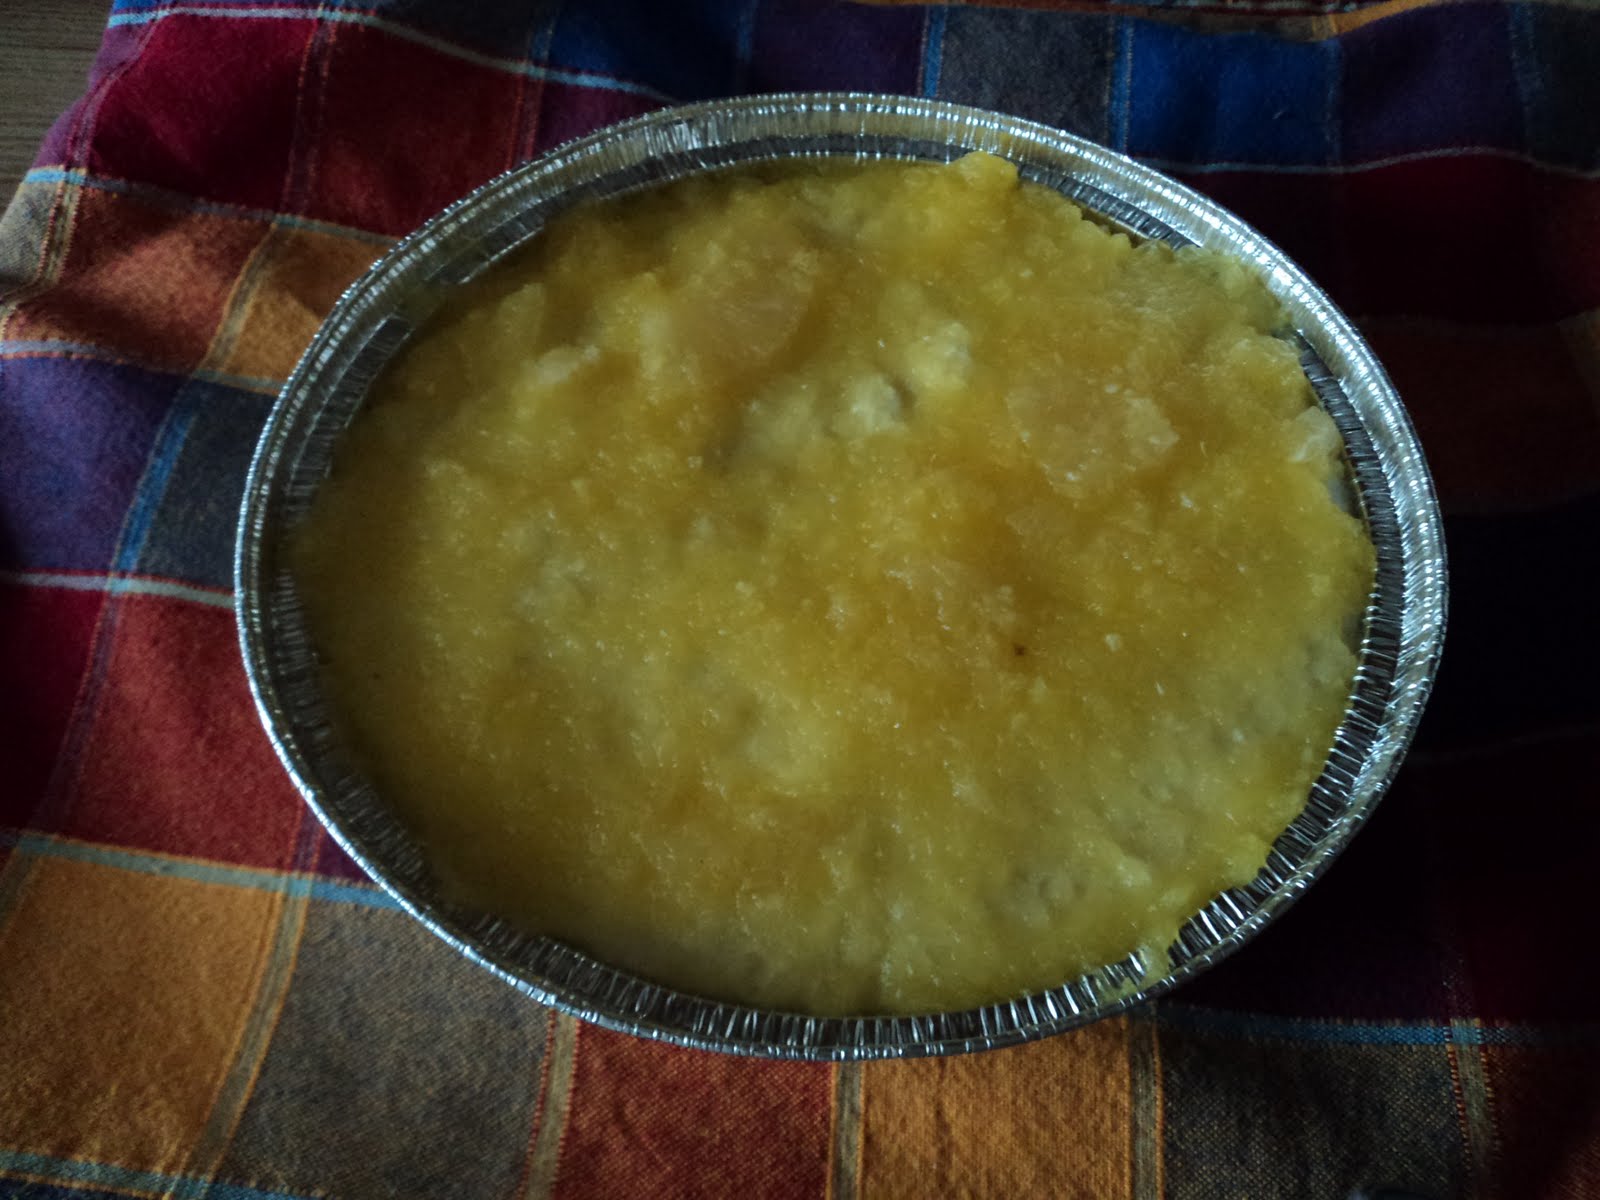
I haven´t got around to tackling one of the bigger or more difficult projects yet.However, I have made the following, simpler Piña Colada cheesecake, taken from the latest issue (No.6)


Here´s a slightly adapted version of the recipe taken from Bricoreposteria:

Ingredients
100g digestive biscuits (I used oaty ones!)
50g unsalted butter
2 coconut yoghurts
250g mascarpone
227g tin of pineapple
100g dessicated coconut*
50g sugar
6 gelatine sheets (you could substitute this for powdered gelatine sachets)
yellow food colouring (optional)

Method
1. Blast the digestive biscuits in a food processor(great time saver!) and melt the butter in a pan over a low heat, then add melted butter to biscuits and mix, till biscuit crumbs start to hold together.
2. Press biscuit mixture into dish and place in fridge.
3. Place 4 gelatine sheets in a little warm water (here is where I got ahead of myself and made a slight both by placing all gelatine sheets in water and then consequently in cheesecake mix but in the end,it wasn´t a big deal and the cake still turned out pretty tasty!) and warm one coconut yoghurt in a glass bowl over a pan of simmering water, then add warm yoghurt to gelatine sheets and stir till gelatine dissolves completely.
4. Add the other yoghurt, the mascarpone, the sugar and the dessicated coconut and mix till well combined, then spoon over the biscuit base and put in fridge while you prepare the pineapple part.
5. Separate the juice/ syrup from the pineapple and heat the juice in a pan or in the microwave, add the remaining gelatine and mix till dissolved.
6. Blast the pineapple & gelatine & pineapple juice in a food processor and add a couple of drops of yellow food colouring if desired and place on top of cheesecake.
7. Leave in fridge for 4 hours or until cheesecake has set.

* As I´m not that fond of coconut, I would reduce the amount of dessicated coconut to 50g next time I make this cake or maybe even leave it out all together as I found it very coconutty tasting,plus the dessicated coconut gives it a very grainy texture, which I didn´t find that pleasant.
* Another adaption I might make next time is try making it with fresh pineapple and soak it in rum...then it would truly be a Piña Colada Cheesecake!




8/22/2011

Giraffe Number Seven cake

I made this Number Seven Giraffe cake for my niece´s seventh birthday, which I took the idea for from Tartas de Fiesta Infantiles by Anne Wilson. I was planning on making my Hot Milk Sponge cake but decided to take a shortcut seeing as I have less time now and -horror of horrors!-used a packet cake mix, Mary Lee American Yellow Sponge cake, which was very quick, easy and delicious. I cooked it in two elongated cake tins and then shaped one to make a rounded face. I think I rounded it a bit too much so it doesn´t quite look as much of a number seven as it should! I then cut a triangle off the other to make it neck shaped, then stuck them together with a little raspberry jam!


This time I tried a different buttercream, Hannah Miles´ buttercream recipe from Big Book of Cakes & Cookies, as usually the buttercream recipe I use doesn´t set, which maybe due to the heat. I coloured the majority of the buttercream yellow and about 1/4 cup of it orange using red and yellow liquid food colouring. Using a palette knife I covered the cake with the yellow buttercream as smoothly as possible but still managed to get crumbs mixed in it. I need to learn how to crumb coat! I then filled a disposable icing bag with the orange buttercream and using a 12 " icing nozzle, piped orange blobs for the giraffe´s spots. For the mane and the giraffe´s mouth,nose and eyes I used sweets such as liquorice and blackberries and voíla a friendly giraffe number seven cake!

I think it was a big hit at my niece´s birthday party as it was soon gobbled up and some kids even went back for seconds or thirds! Next year I think I´ll have to make a bigger cake!!


8/14/2011

Miami Gastro, Ciudad Real

Miami Gastro is a very new restaurant which opened recently at Avenida del Rey Santo in Ciudad Real and belongs to the same restaurant group as Miami Park, one of the supposedly most expensive and best restaurants in Ciudad Real. However, Miami Gastro is more of a gastro pub and is more of a place to eat small raciones rather than a large meal!

It is housed on two floors, the bottom floor is a bar area with some seated and standing areas whereas upstairs is a more formal sit-down restaurant area. The whole restaurant is very chic,modern and trendy.


When I went, San Fermines was about to finish so the waitresses were dressed in San Fermin outfits (white clothes with a red bandana) and there was a special menu for San Fermin although we didn´t go off that menu. Apparently there is also a special taster menu for only 20 euros but we didn´t see this at the time. We chose a rocket salad with cheese and a balsamic vinegar dressing (if I remember correctly), chicken sticks, which were long,thin crispy sticks of chicken in filo type pastry with a curry sauce (pictured below)-very delicious!


Mini gourmet burgers of beef/ox (buey) with gorgonzola cheese and rocket salad.I had a plain burger as I don´t like blue cheese although they offered to give me the burger with Cheddar cheese but in the end they didn´t have any! The burgers were very tasty, juicy,meaty and tender. We also couldn´t leave without trying the famous courgette flowers, which are coated in a crispy batter very similar to Tempura and stuffed with goats cheese and herbs, also very tasty but rather on the expensive side as you only get one courgette flower for 5euros!


Everyone went for yoghurt foam with fruit for dessert which came in little glass pots and were apparently delicious. I selected my dessert from the San Fermin menu, which I was luckily allowed to do, and decided on a cherry and almond tart. It was very reminiscent of a Cherry Bakewell tart and was absolutely yummy-one of the best desserts I´ve eaten in a Spanish restaurant.


All in all, I was very impressed with the restaurant, the food was amazing and the service was very helpful, quick and friendly. The only thing I would say is that the portions are fairly small and they are quite expensive,particularly the courgette flower for what it is! It has now become one of my favourite restaurants and I´m looking forward to taking my parents there next week! I also have to add that they do cocktails there but as of yet I haven´t been able to try any yet!


7/27/2011

Amaretto Gelato


I had planned on making all types of ice cream, sorbets and cold desserts this summer seeing as it´s so hot that I never feel like baking or even turning on the oven but that kind of all went out the window since having Chloe as it´s really difficult trying to find the time!!! Anyway, I did manage to grab some time to make this Amaretto Gelato....I absolutely love anything Amaretto flavoured or with Amaretto in it! The recipe is based on a recipe from a Better Homes and Gardens Cook Book. Gelato is Italian based ice-cream which has a lower butterfat content than ice cream but it tastes just as delicious!


Ingredients (about 6 servings)


6 egg yolks (beaten)

2 cups milk

3/4 cup sugar

between 1/8 to 1/4 cup Amaretto


Method

1. Place sugar, milk and egg yolks in a pan and cook over medium heat while stirring, till it coats a metal spoon. Be very careful not to overcook as the mixture starts to look like scrambled egg (I know as this happened to me!). If this happens, place in food processor/blender or use an electric hand whisk and blend or mix till you have a smooth,thin custard-like liquid.

2. Add Amaretto and stir to combine, then place in a airtight container and cover with clingfilm and place in fridge overnight or for several hours.

3. Place in freezer and freeze for about 45 mins, then remove from freezer, stir up gelato to break up ice crystals, then place back in the freezer for a couple of hours until set.

4. When ready remove from freezer and serve (I found that it was frozen solid and was very difficult to serve so I´d recommend leaving it to soften a little before serving) and sprinkle with crushed Amaretti biscuits.

7/11/2011

Sabor y Sazón Columbian Restaurant, Ciudad Real

Since having Chloe I haven´t had much time for cooking & baking or blogging although I have managed to make a salad dressing, one quick chocolate cake which I whipped up in my Kenwood food processor and spaghett bolognese so it´s a start!! However, we have been doing quite a bit of eating out with my parents, trying out or taking them to new restaurants. As my parents have never tried Columbian food, we decided to take them to Sabor Y Sazón. Unfortunately, the restaurant is being sold so I think I must be a bearer of bad luck as the shop I liked, Fabricando Delicias, closed and a shop which was the only shop in which I could find tilapia also closed!

Sabor Y Sazón is a fairly small restaurant,not particularly chic but cozy. The restaurant does a taster menu for only 10 euros per person minus drinks so it´s very reasonable too. We all chose a taster menu, which is comprised of about 5-6 small courses. First of all we had empanadas, a type of cornmeal pasty filled with meat (shown below)


The second course was a fried cornmeal ball stuffed with meat, potato and rice (very delicious but also very filling!) (shown below)


We then had an arepa (a flat,round patty made of corn flour) with cheese on it, followed by two smaller arepas,one with chicken on and the other had tuna on it.By this time, I was full to bursting and yet there was still one more dish! However I couldn´t eat the tuna arepa or the final dish, which is a flat cake or patty made from banana and which was topped with prawns and thousand island dressing. As we were all so stuffed none of us tried a dessert but they also have a variety of tropical juices which you can have with either milk or water. My mum had mango juice with milk, which was lovely and creamy and tasted very similar to a mango lassi and on the waiter´s reccommendation , I tried a fruit juice I´d never heard of with water, lulo (also known as naranjilla) shown below:


Although it doesn´t look very appealing, it´s a greenish colour and is quite lumpy looking so a bit reminiscent of puke really, it has a sweet acidic taste, which was actually very refeshing and pleasant tasting!

As I ´ve never been to another Columbian restaurant before I have nothing to compare this restaurant to but on the whole, it´s a nice restaurant where you can find good, tasty, filling, and reasonable food.


Related Posts with Thumbnails