5/01/2010

Burn Baby Burn


Is it a new form of modern art sculpture or is it a plane? No, it´s actually all that remains of my very handy measuring teaspoon. It somehow ended up in the oven when I was making some Caramelized Red Onion and Goat´s Cheese Tarts (I have absolutely no idea how it got there!) In fact, my boyfriend only discovered it when he opened the oven to put in a pizza, so he got landed with the lucky job of cleaning it up!!

4/23/2010

Mixed Mushrooms in a Thai Red Curry Sauce

I´ve made this dish a couple of times and always mean to blog it but have never got round to it or taken a picture of it. I really wish I had though!! It´s a simplified version of a recipe from a recipe book called Cocina Asiática Vegetariana by Anne Wilson, as there are many ingredients which I simply can´t get hold of where I live. However, I think this adaped, simplified version is probably just as good as the original version. It´s also a very easy and quick dish to prepare.

Ingredients (Serves 2)

A packet of mixed Asian mushrooms (around 200g) (shiitake, enoki and beech mushrooms for example)
an inch of ginger, finely chopped
1-2 tsp red curry paste (depending on your spice threshold level!)
1 tsp soy sauce
1/2 tsp sugar
80ml (1/3 cup) vegetable stock (I used Oxo veggie stock cube)
1/2 cup of coconut milk/cream (this time I used coconut powder, about 65g powder mixed with around 125ml hot water to make a thicker milk)
1/2 tbsp lime or lemon juice (whatever you have in the fridge!)

Method:

1. Fry curry paste and ginger together for 3-4 mins till it becomes aromatic.
2. Add vegetable stock, sugar, soy sauce, coconut cream or milk and lime/lemon juice and lower heat (to around 4 on an induction electric hob) and simmer for 3-4 mins until the sugar dissolves.
3.Add the mushrooms and cook 3-5 mins until mushrooms are cooked.
4. Boil some Basmati rice in the meantime to serve with the mushrooms.

4/19/2010

Bilbao-style meatballs (Albóndigas a la bilbaína)

Although this picture doesn´t do the meatballs much justice and I can´t say much for my presentation here, but it is a delicious dish, trust me!! There are so many meatball recipes and this is my latest favourite. It is adapted from a recipe from the book Las 1000 Mejores Recetas de Cocina.

Ingredients (serves 2)

250 g pork &veal/beef mince (I had just under 200g)
1 slice of bread (made into crumbs) or 25g breadcrumbs
1 egg, beaten (only use half of it)
2 garlic cloves,finely chopped
oil
1tsp dried or frozen parsley
salt & pepper to taste
flour
1tbsp milk
Sauce:
1/2 medium sized onion,sliced
1-2 carrots, finely sliced
1tbsp olive oil
20g tomato sauce
1 (Oxo)beef stock cube made up to 1/4 cup
1/4 cup white wine
salt and pepper to taste
1tbsp flour

Method:

1. Soak the breadcrumbs in the milk, then place mince, breadcrumbs, garlic, parsley, salt and pepper and egg in a bowl and mix until combined.
2. Form into round balls of equal size and roll in flour.
3. Fry onions and carrots in 1tbsp olive oil till soft.
4. Mix the tablespoon of flour to the beef stock and add to onion and carrots.
5. Add tomato sauce and wine and season with salt and pepper-cook on a medium heat for 15-20mins till sauce thickens as shown in picture below:


6.While sauce in cooking, heat abundant olive oil in a small frying pan and when hot, add meatballs until browned.
7.Drain meatballs in kitchen roll to get rid of excess oil and then add to the sauce.
6. Cook for a further 20 mins in sauce until meatballs and carrots are cooked through.
7. Serve with potatoes, pasta or rice.(I´m not sure if traditionally these meatballs are served with anything in Bilbao but I like to eat it with one of the aforementioned carbohydrates!) Enjoy!

Look out for my upcoming posts about Mixed Mushroom Thai Red Curry and my review of a Sugarcraft DVD!


4/16/2010

Baby Cupcakes & Glace icing

I´m on a baking roll at the mo!! I saw these cute baby shower cupcakes on the Internet and thought they didn´t look too difficult to make so I thought I´d have a bash at making them for some friends, who´ve just had their second baby, a baby boy. I found some blue paper cupcake cases in the Chinese shops and made a simple vanilla cupcake (if you want I can post the recipe). I was a little disappointed as the cupcakes didn´t have as strong a vanilla flavour as I was expecting them to have, maybe it has something to do with using aroma de vanilla (I´m not sure if it´s exactly the same thing as vanilla essence or extract but it´s the closest I can get where I live!) I´ve come to the conclusion that I need some a muffin pan as the one I have is better for fairy cakes.


Glace icing is one of the easiest frosting for cakes however I´ve only made glace icing a few times and usually I´ve never had enough to cover the whole cake/s. So, this time I referred to the Internet but my icing turned out too thin so I added more icing sugar and a little water until it had the perfect consistency. This is my recipe for glace icing:

200g icing sugar
2tbsp and 1/4tsp water
Mix until it reaches right consistency and spreadability.

After consulting the Internet once again about how to obtain a skin-coloured icing, I added one drop of red food colouring and two drops of yellow food colouring (which you can now also find in the supermarket Eroski!!).I think my skin tone colour turned out pretty realistic even if I do say so myself. Using the chocolate icing pen, I drew a little curl for the hair, the eyes and mouth. For the dummy, I used gummy sweets. I used red euro style gummy coins although I had wanted something with a more oblong shape but couldn´t find exactly what I was looking for! On the website where I first saw these baby cupcakes they used Lifesavers or you could also use fruit Polos but seeing as I couldn´t get either of these in Spain, I saw some gummy sweets with a plastic dummy holder, which were perfect. I pulled off the gummy sweets and made a slit in the gummy coins and inserted the plastic dummy holders into the gummy coin, then stuck it into the cupcakes and vóila, you have some easy and really cute baby shower or christening cupcakes!


4/06/2010

Low-fat gingernuts

Baking is my new passion and as they say practice makes perfect! However, as I´m getting married soon and don´t want to put on weight, I opted to make these low fat gingernuts using a recipe from my trusty Weight Watchers Made to Measure recipe book. I used to be able to buy McVities gingernuts in the local Mercadona but they stopped selling them and this homemade version is just as good if not better! Usually when I bake biscuits they never turn out right but I have to say these are the best biscuits I´ve ever made! Although the biscuits were quite small, they were quite thick and chunky with a nice crunchy base. I didn´t alter the recipe as it didn´t need it and at only 80 calories per biscuit, what more could you want ?


Gingernuts (makes 12) according to Weight Watchers recipe book


Ingredients


2 tsps ground ginger


120g (4 oz) self-raising flour


1/4 tsp ground cinnamon


1/2 tsp bicarbonate of soda


60g (2oz) margarine


1 tbs honey


30g (1oz) soft brown sugar

Method


1. Preheat the oven to 180ºC, 350ºF,Gas Mark 4


2. Sieve flour, spices and bicarbonate of soda into a bowl.


3. Heat the margarine, honey and sugar in a small saucepan until the margarine has melted and the sugar has dissolved.


4.Pour into flour and mix well.


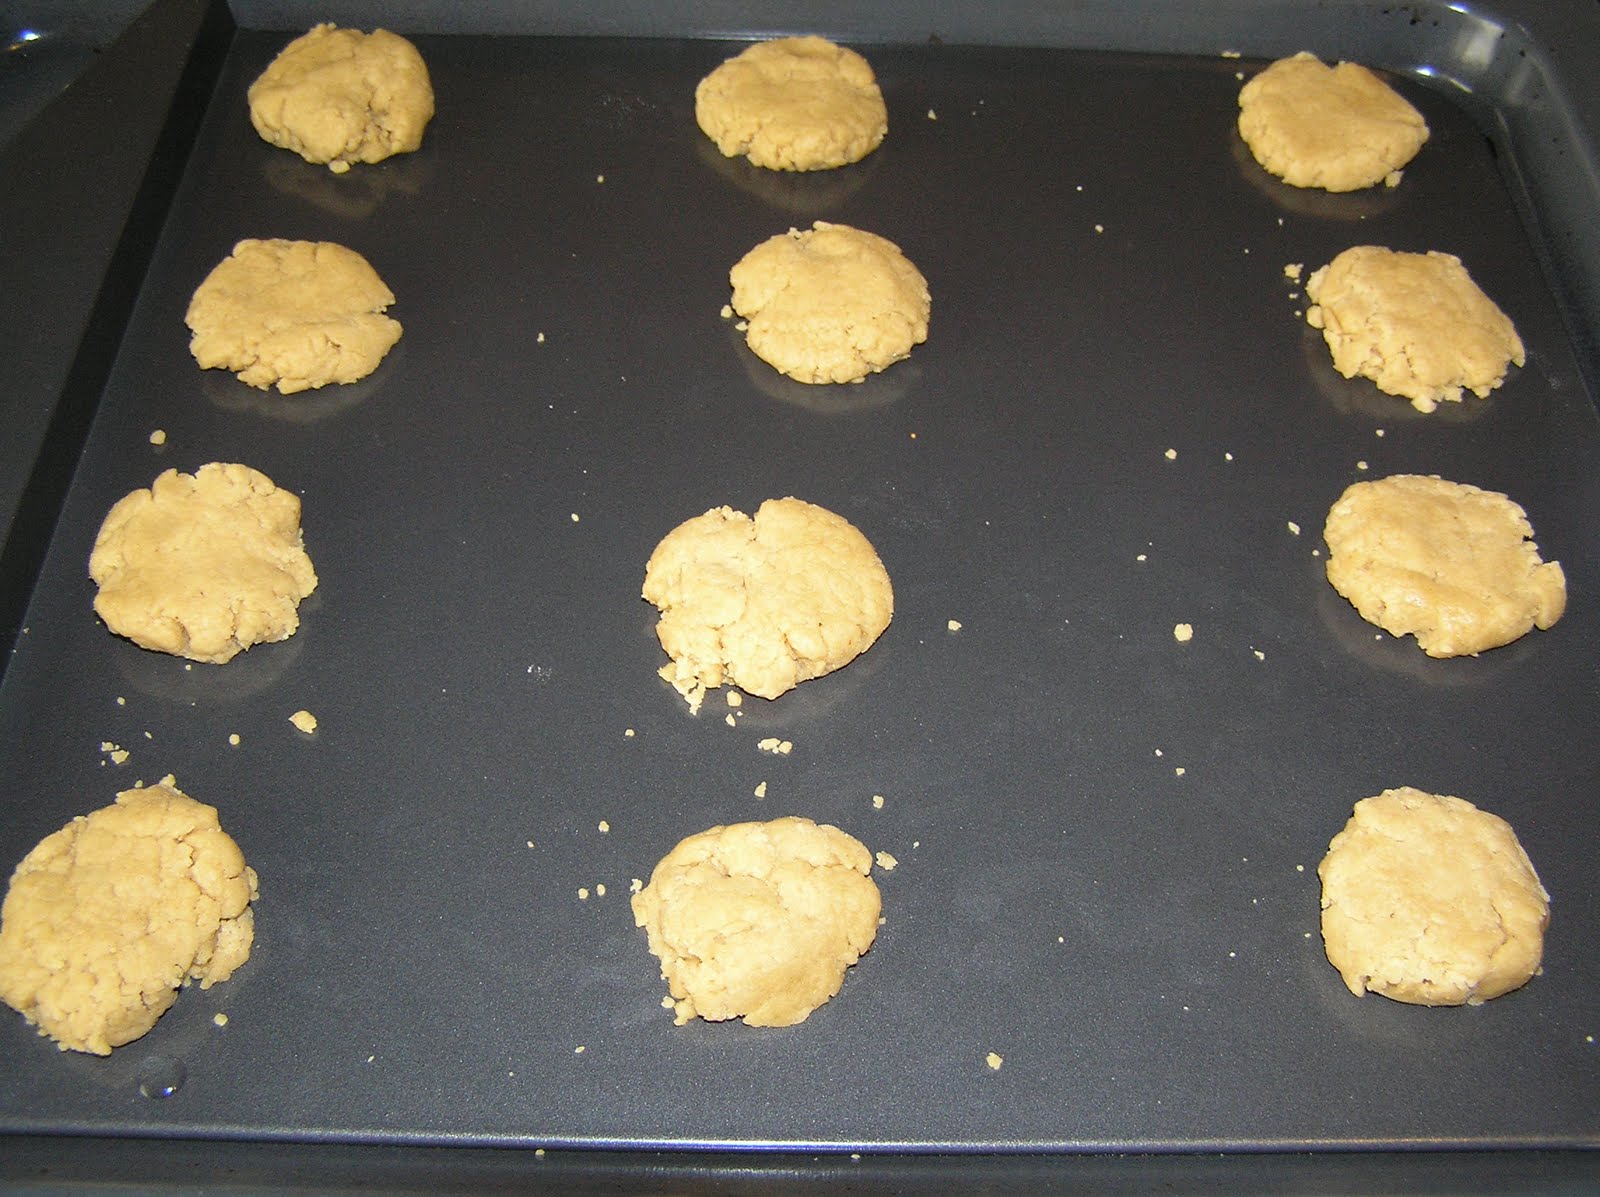
5. Divide mixture into twelve equal pieces and form into balls as shown in the picture:


6.Flatten biscuits slightly with the palm of your hand:


7. Bake in oven for 15-20 mins till biscuits turn a golden brown colour.

Once cool, you can enjoy them with a nice cup of tea!
Tip: I once read or heard a tip from Jaime Oliver or someone to get honey or golden syrup to run off your spoon, run the spoon under hot water for a couple of minutes and then the honey/syrup should run off the spoon easier.


3/21/2010

Cake Decorating-Marbled Honey & Chocolate Cake

I´ve always loved baking ever since I used to help my Gran, who´s a great cook, when I was a little girl. Although my passion for baking has increased, I still have a lot to learn especially when it comes to the decorating part!! I usually make cakes for my boyfriend´s birthday and my friend´s birthday but usually either I haven´t made enough icing or it doesn´t turn out very smooth so I am particularly proud of my latest cake as it´s the prettiest cake I´ve ever decorated!

I chose to make a Marbled Honey & Chocolate cake but I haven´t included the recipe as it was from one of my recipe books "Chocolate Cakes & Slices" and I followed the recipe to the letter. The resulting cake though was very tasty and really moist. Armed with my new gigantic sized spatula, I set to work icing the cake with a chocolate honey flavoured icing, which as you can see turned out pretty smooth for once!

This is the before picture. I found some sugar stars and a pink icing pen (I think I would rethink the pink icing on chocolate next time-alhough the icing pens only came in the choice of two colours: pink or chocolate!)in the supermarket, which I thought would jazz up the cake and make it look prettier. I placed the stars around the outer edge of the cake alternately, white, yellow, white, yellow, then using the icing pen wrote the message, which was a little splotchy but not too bad for a beginner!Here´s the cake after I´d finished decorating it! It was a belated cake for my friend´s 30th birthday!


3/10/2010

Pork Stroganoff


(Just added a photo to this post after making this dish again!)
I´d taken a pork fillet/escalope out which had been left over and was at a bit of a loss as to what to do with it seeing as I was only cooking for myself. In the end, I decided to use up some of my leftovers and although I wouldn´t say that I´m a very creative cook, I came up with this pork stroganoff dish without using a recipe,which turned out to be rather delish, even if I do say so myself! Unfortunately, I didn´t get a photo of it as I was so hungry that it hardly lasted two minutes on the plate before I had wolfed it down! This is roughly what I did!

Ingredients (Serves 1)

1 small pork fillet/escalope (it was so small I actually added the green pepper to bulk out the meal and add more veggies to the meal)

1 small onion or 1/2 a medium onion, chopped

1/4 green pepper, chopped

3 small mushrooms, sliced

1 tbsp plain flour

1/4 cup cream ( the remainder in my case)

salt & pepper to taste

1/4 cup of cider (also left over from other pork recipes)

olive oil or butter

Method

1. Chop pork fillet into thin slices.

2. Fry onion, mushrooms and green pepper till tender.

3. Add pork & season with salt & pepper and fry till browned.

4. Mix flour and cream together.

5. Add cream and the cider and cook till sauce thickens and pork is cooked through, about 5-10mins.

6. Serve with pasta or rice.

If the sauce reduces too much, add a little more cream (or milk in my case as I didn´t have any more cream). If anyone decides to make this recipe, I´d love to hear your feedback and any suggestions of how to improve it & make it even more tasty!
 
Related Posts with Thumbnails